This recipe requires no elaborate preparations, so don’t need to plan ahead either. Just stir together the ingredients to make a batter, pour it on a hot griddle & cook up to delicious pancakes that will be loved by your whole family!
What is Chilla – Cheela
Chilla also spelled as “Cheela” are basically sweet or savory Indian pancakes made with various kinds of lentil & cereal grain flour. These pancakes are also known as pudla or puda. Chilla are mostly made with unleavened batter so they are considered to be healthy. There are many kinds of chillas made in the Indian homes using various kinds of flour like oats, semolina, millet flour and even wheat flour. We also make them with lentils like chana dal, moong dal and mixed lentils. Here are a few if you want to try out – Moong Dal Chilla & Oats Chilla. Besan chilla is much loved by many as these are fast to make & are aromatic & tasty.
About Besan Chilla
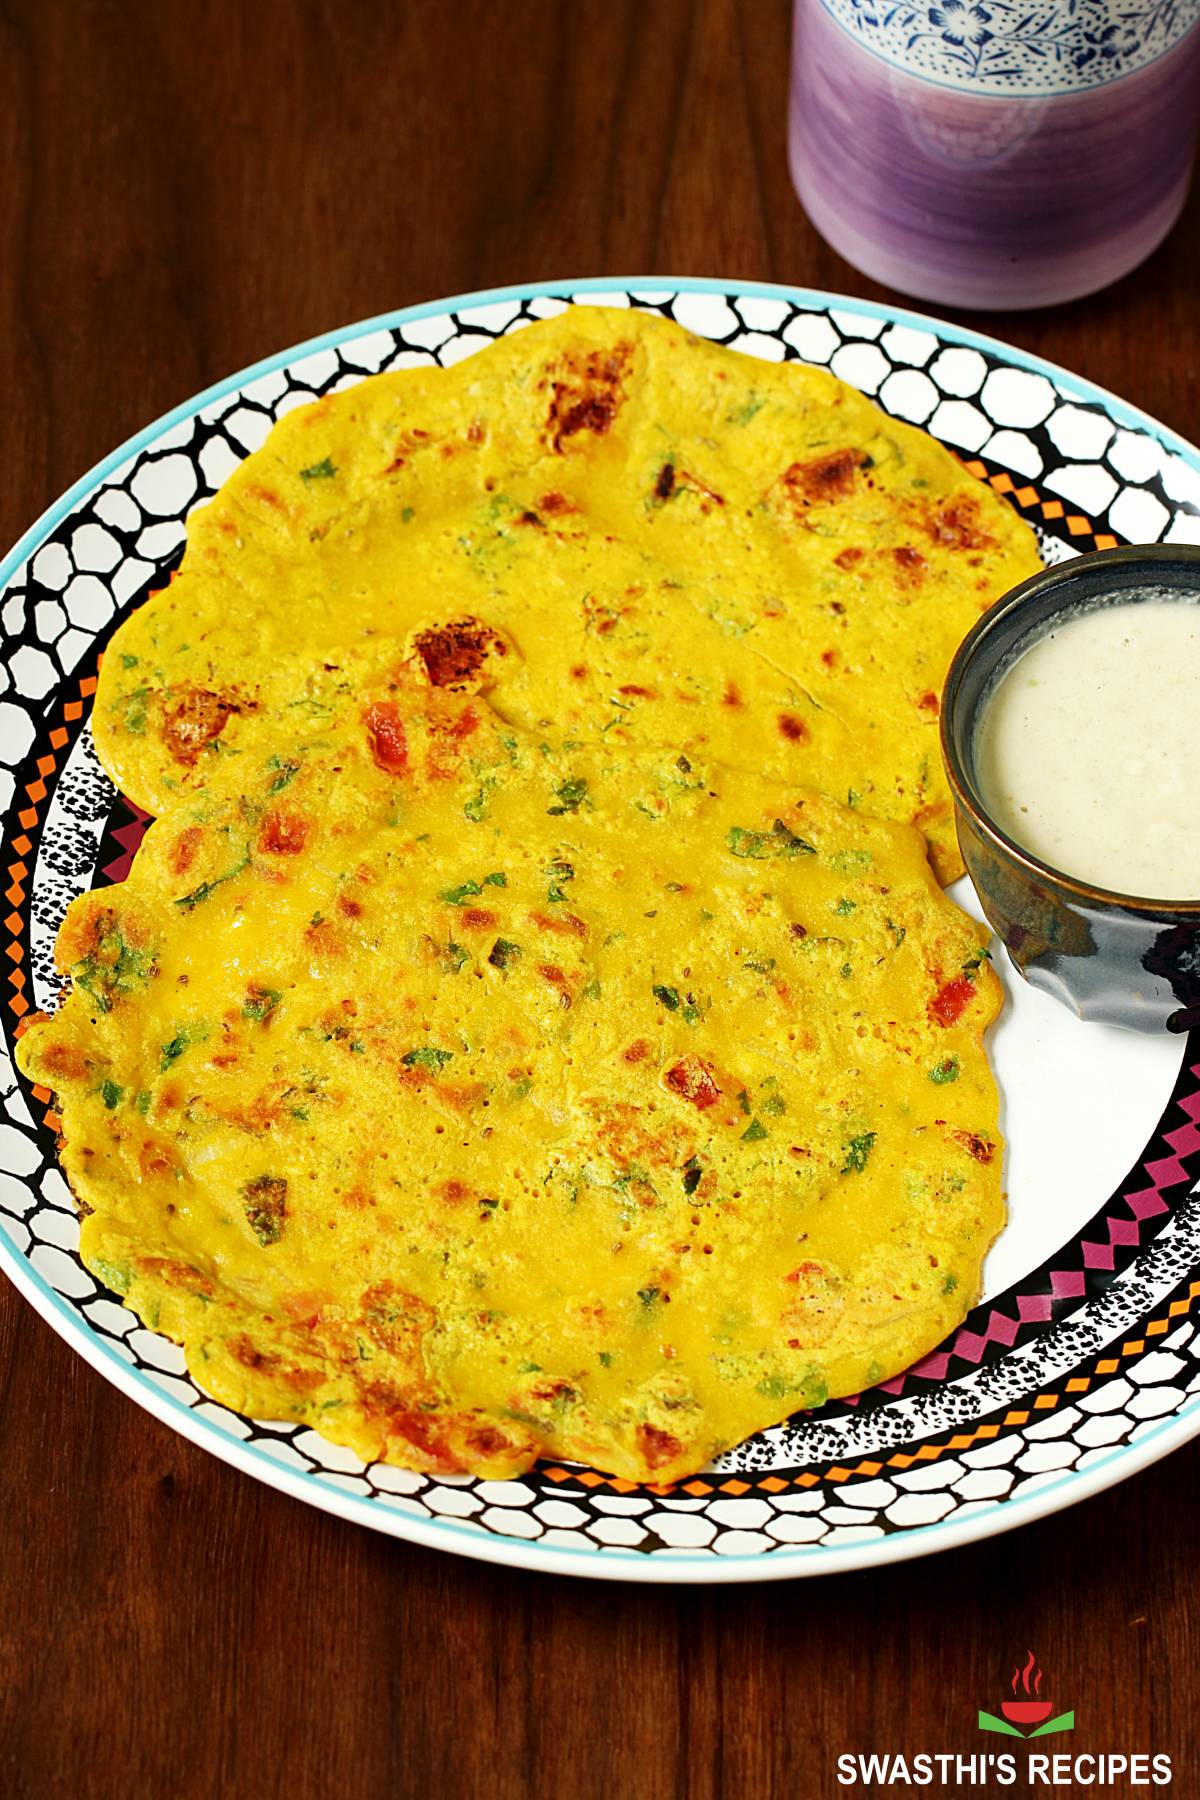
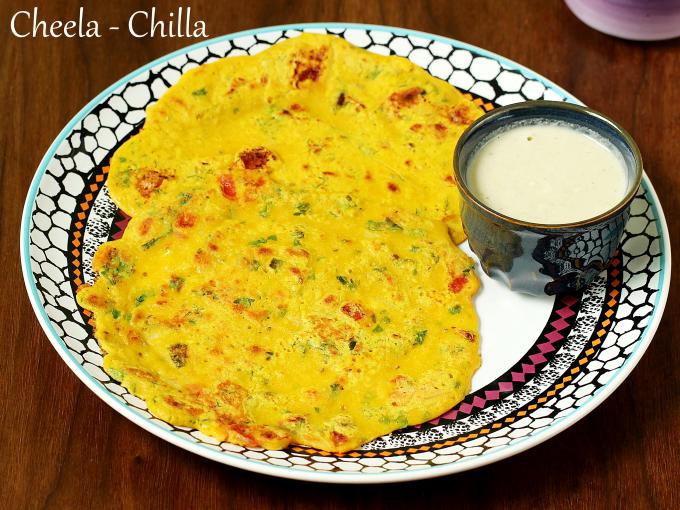
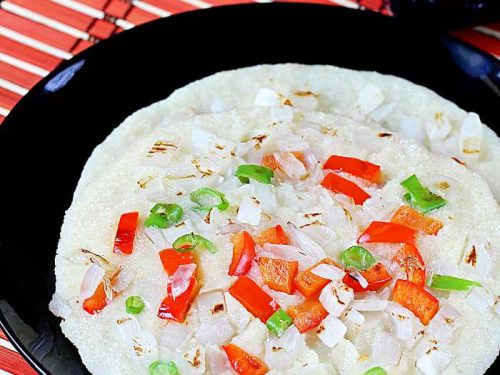
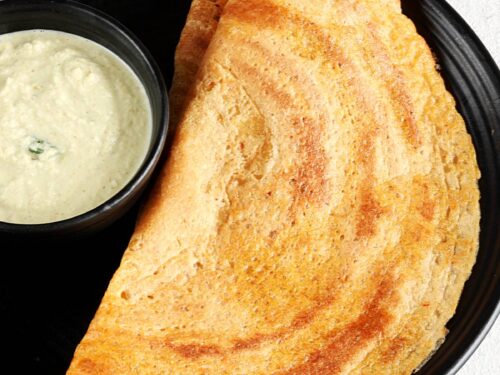
‘Besan’ is a Hindi word for ‘gram flour’ and chilla is a pancake. So besan chilla are gram flour pancakes. These are naturally gluten-free, vegan and nutritious. They are cooked with minimum fats like oil or ghee. Besan Chilla is also a popular Street food in the Indian cities where you see the vendor making them instantly right in front of you. The recipe requires only the basic veggies like onions and tomatoes. However to perk up the nutrition you can also add some grated carrots or fine chopped baby spinach. I usually go with the basics – onions & tomatoes as this recipe is meant to be fast. Sometimes just to use up the surplus I add spinach or carrots. A lot of people eat besan chilla on their own with just a cup of chai. However at home, we love these with a spicy chutney like this Garlic chutney, Pudina chutney or Coriander chutney. They also go well with a pickle. More Instant Breakfast recipes,Rava uttapamWheat dosaOats dosaAkki roti
How to Make Besan Chilla (Stepwise photos)
Make Batter
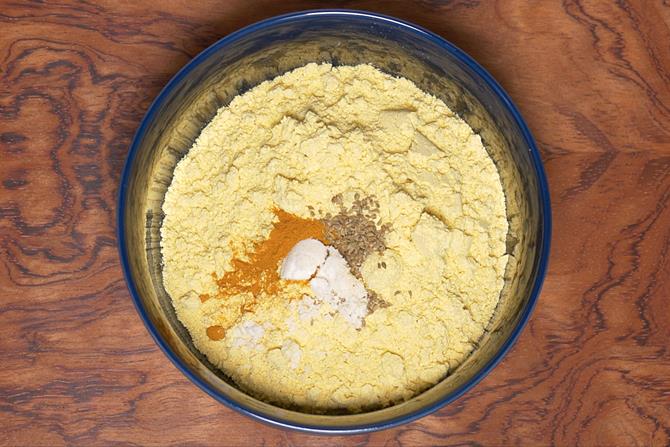
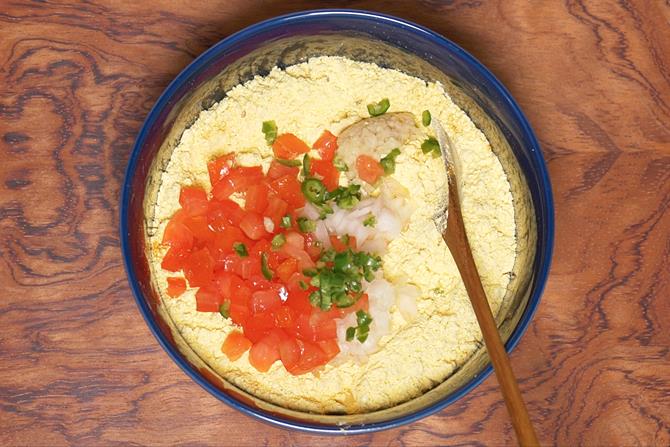
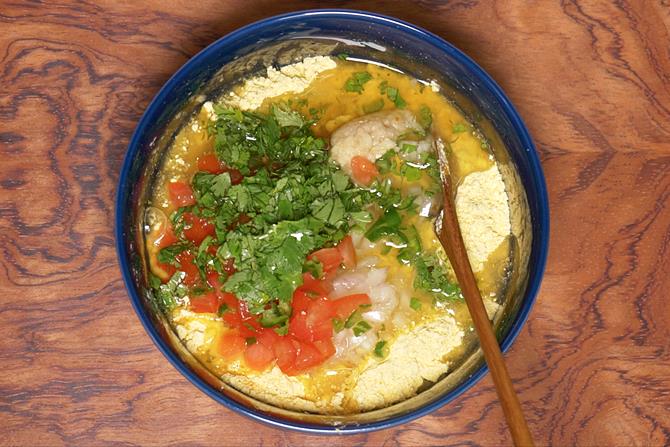
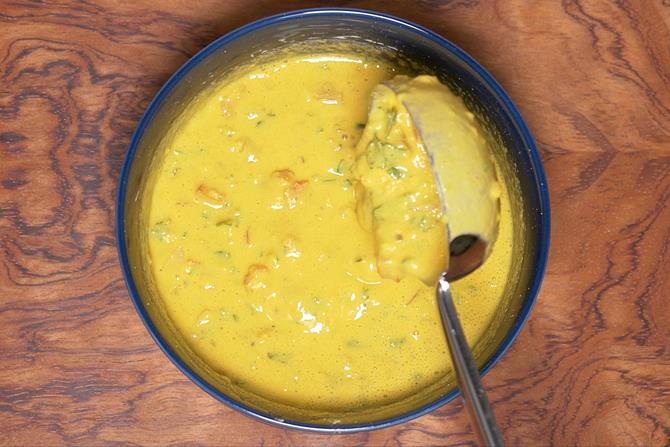
1.Rinse and fine chop 1 small onion, 1 green chilli pepper and 1 small tomato. 1 chopped onion comes upto 3 tablespoons & 1 small tomato comes upto 3 tablespoons. Also grate half inch piece of ginger (1 teaspoon). Rinse and chop handful of coriander leaves. 2. Add 1 cup besan, salt as needed, half teaspoon ajwain and 1/8 teaspoon turmeric to a mixing bowl. Mix up all the ingredients. 3. Then add finely chopped onions, tomatoes, grated ginger and green chilies. Make sure onions and tomatoes are very finely chopped. 4. Add coriander leaves and pour 3/4 cup water. 4. Mix gently and make a batter of thick but pouring consistency. 5. Add more water if needed. I used little less than 1 cup. If the batter is too thick then the chilla will not cook properly and may cause stomach upset. (check the video for consistency)
Make Cheela
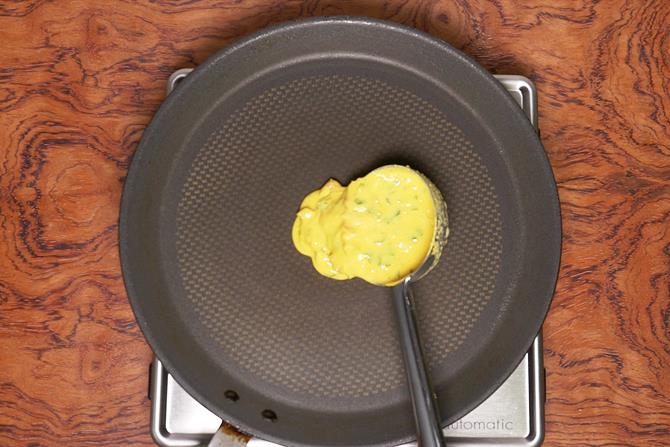
- Heat a tawa or griddle. If not using non stick pan, then grease it well with few drops of oil. When it is hot enough, pour one ladle full of batter in the center.
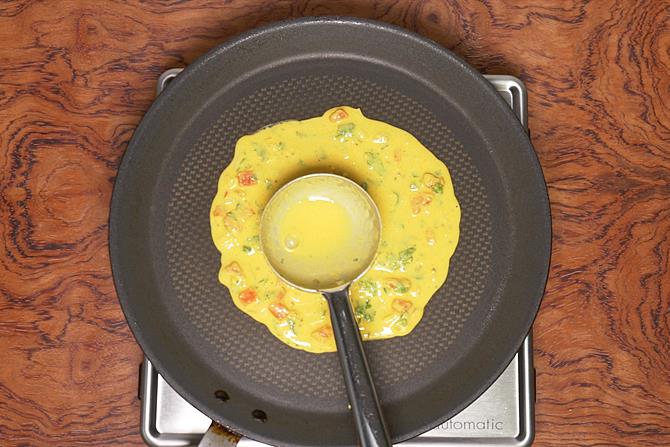
- Spread it as thin as possible.
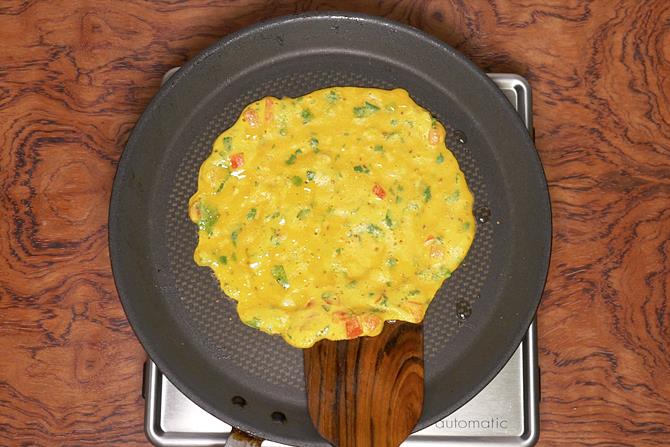
- Regulate the flame to medium and drizzle 1/2 to 3/4 tsp of oil or ghee.
- With in few minutes, you will see the edges begin to leave the pan.
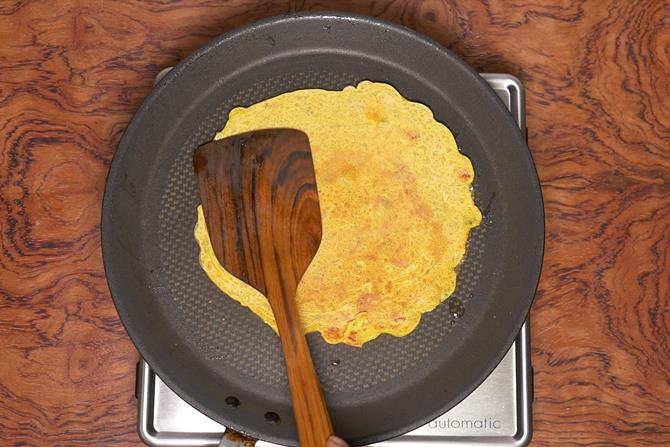
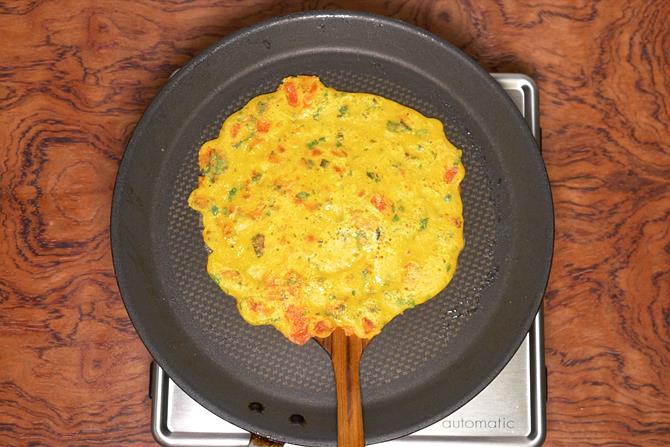
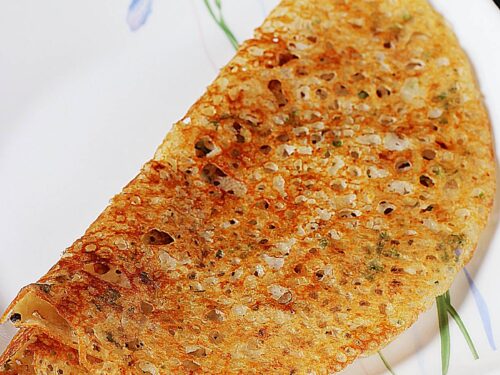
- Flip it and cook pressing down with a spatula for thorough cooking.
- When you see brown spots on the cheela, you can remove it to a plate. If you like soft chillas, cover them immediately. Serve besan chilla hot with masala tea, pickle or a chutney.
Pro Tips
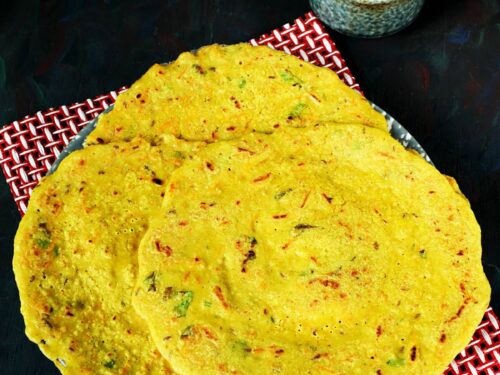
Gram flour goes rancid too quickly & taste bitter even when it is within the shelf life. So always taste test the flour (besan) before using. A good way to store besan is to refrigerate it after buying so it keeps fresher for longer. Vegetable & greens: Not all veggies go well in a chilla. So please use only veggies that you prefer. This time I used onions, tomatoes and coriander leaves. On occasions I also use grated carrots, baby spinach and fine chopped bell peppers, just to use up the surplus. Spices: Carom seeds also known as ajwain is most commonly used here as it makes a great combo with besan. These seeds also aid in digestion and impart a good aroma to the chilla. Ginger apart from imparting a great aroma, helps in digestion. Turmeric gives a very good yellow color to your chilla. Leavening agent: Chillas are always made with unleavened batter. So they come out dense. To make them lighter, add ½ teaspoon Eno or 1/8 teaspoon baking soda with 1 tablespoon lemon juice. But add the leavening ingredient just before making the chillas.
Besan Chilla for Toddlers
If making for toddlers, soak the gram flour for about an hour. This help to reduce the chances of stomach upset & helps to digest easily. After soaking the batter becomes thicker, so add more water as required before making the besan chilla. Also ensure the chilla is cooked well for the same reason.
Make Ahead & Reheat
Storing: These besan chillas are healthy and best if served hot, immediately after making. They become dense & drier as they cool down. However if you prefer to store them. Cool the cooked chillas completely before placing them in an air tight steel or glass container & refrigerate. They keep good for 2 days. Reheat on Griddle: Reheat them on a griddle (covered) on a low heat, flipping after a few minutes. These can also be heated in a microwave (high) for 1 minute. The longer you chill them the more time they take to get heated. Reheat in the Oven: You can also reheat them in a preheated oven at 480 F or 250 C. Pace 2 to 3 besan chillas in a prepared tray. Heat for 2 to 3 mins, keeping a close eye on them so they don’t over cook and turn hard. Make batter ahead: If you do not have much time to make these besan chilla in the mornings, you can make the batter the previous night & refrigerate. But without adding any veggies like onions as the onions alter the flavour of the chilla batter. The next morning, add the chopped onions and give a good stir, just before pouring the batter on to the griddle. After refrigeration the batter soaks up most of the liquid and becomes thicker. So add water as required to bring it to the right consistency. If the batter is very very cold, the besan chillas will brown without cooking well. So it is good to keep the batter out of the fridge for 30 to 40 minutes before making the chillas. These will help you to make them ahead. But this is a fast recipe, so try to make fresh and eat them fresh & hot.
Faqs
Related Recipes
Recipe Card
Recipe first published in November 2017. Updated & republished in July 2022.